How to edit about me on blogger:
Blogger is the google free blogging platform. Everyone would like to add “about me” pages in blogger. In this tutorial, we are going to see how to edit about me on blogger.
There are Three methods are there…
Also see:
How to create Awesome Blog in Blogger.com
How to hide author Name in blogger post with simple steps
How to Delete your blogger blog permanently
How to Change Author photo in blogger for premium template
3 Simple Way to change blog author name on blogger
How to Create Image URL in png or Jpg or gif format
How to Change Admin Name in Blogger
How add Menu and Submenu in blogger
How to change theme of your blog in blogger
How to Edit about me on blogger
How to change profile picture on blogger with Pictured Explanation
How to Create pages in Blogger with 7 steps
- Custom about me
- Blogger profile about me
- Image method
Custom about me:
Step1: Login to your blogger dashboard.
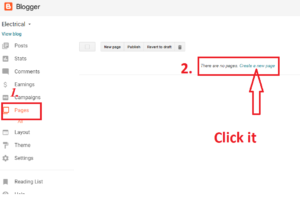
Step2: Go to Pages
Step3: Click new pages
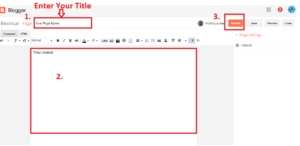
Step4: it will redirect you to the content editor page.
Step5: Enter title of your page “about me”
Step6: Create some text about your self
Step7: Post-it.
Step8: Copy the link of your page as shown in picture….
Also see: How to get pages link, see there, 3rd picture.
Step9: Go to Layout
Next steps: Click this to continue => How to add menus and submenus in blogger.
Step10: After creation of menu, Visitors visit your profile, by selecting about us pages
Blogger profile:
Step1: Login to your blogger dashboard.
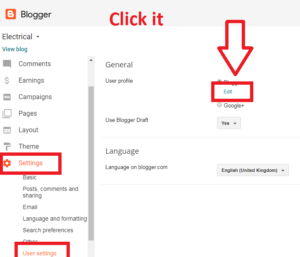
Step2: Go to setting
Step3: Go to user setting
Step4: Select blogger
Step5: Click edit
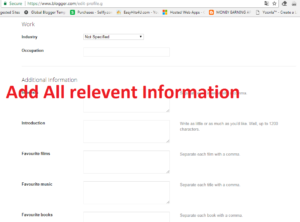
Step6: There you see “Display Name”
Step7: There you enter yours desire name to be displayed. And fill all relevant information about yourself in all the box.
Step8: click Save at the downside
Step9: That’s all you Have done it.
The above details will replicate in your about me blogger gadget place.
Image Method:
In this method you have to add image gadget…it will display your name and your bio details with your photo.
Step1: Go to blogger dashboard
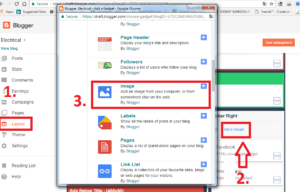
Step2: Go to Layout
Step3: Click Add gadget in the sidebar
Step4: You will see popup blogger window there Select “images”
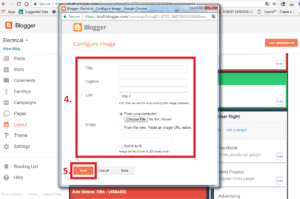
Step5: See you see a new window “ Configure images”
Step6: There you just follow this,
Title: About me
Caption: Bio details or your description
Link: your blog URL
Images: Upload images if you have your image on your PC or enter your image URL
Note: your Image URL should be in .png or .jpg or .JPEG format
Click Shrink to fit.
Step7: Save it… that’s all.
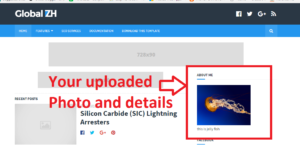
Now View your Blog… you can see your profile at the sidebar of your blog

