How to Create Image URL in png or Jpg or gif format:
The image URL is necessary to avoid multi upload. Once, if you have created means, it can be used in anywhere on the internet. This method is very simple and does not require any software or coding knowledge. In this tutorial, we are going to see how to create image URL in png or jpg or gif format.

Follow my steps:
Step1: create a blog in Blogger.com
Also see: How to create a free blog in blogger.com
Step2: log in to your Blogger dashboard
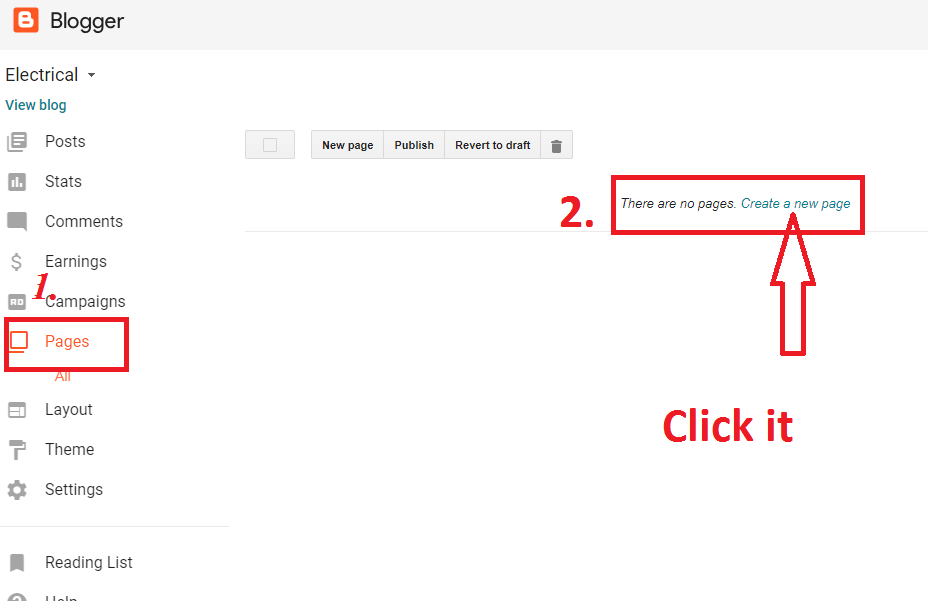
Step3: Click pages in blogger dashboard
Step4: Click create the new page
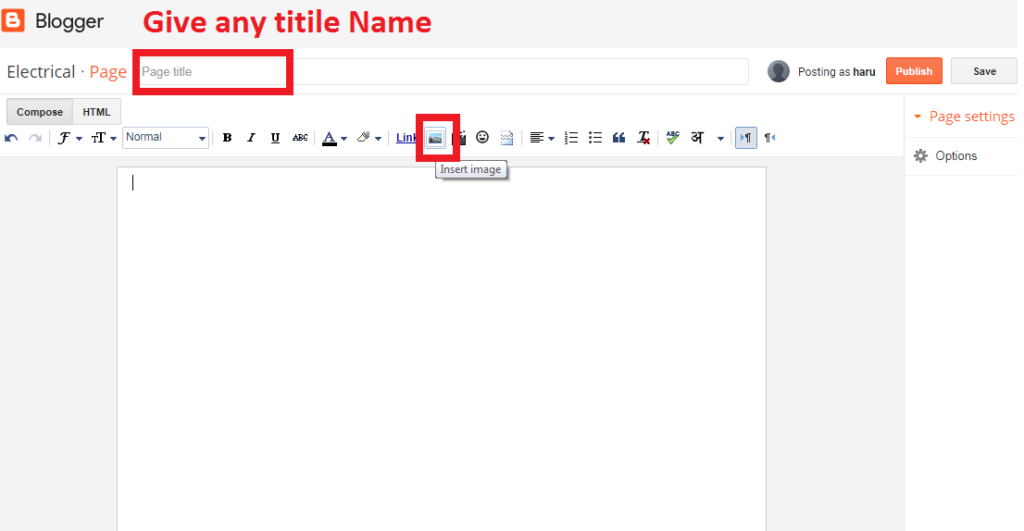
Step5: it will redirect you to page content editor
Step6: Give any title
Step7: Click insert image as shown in the picture.
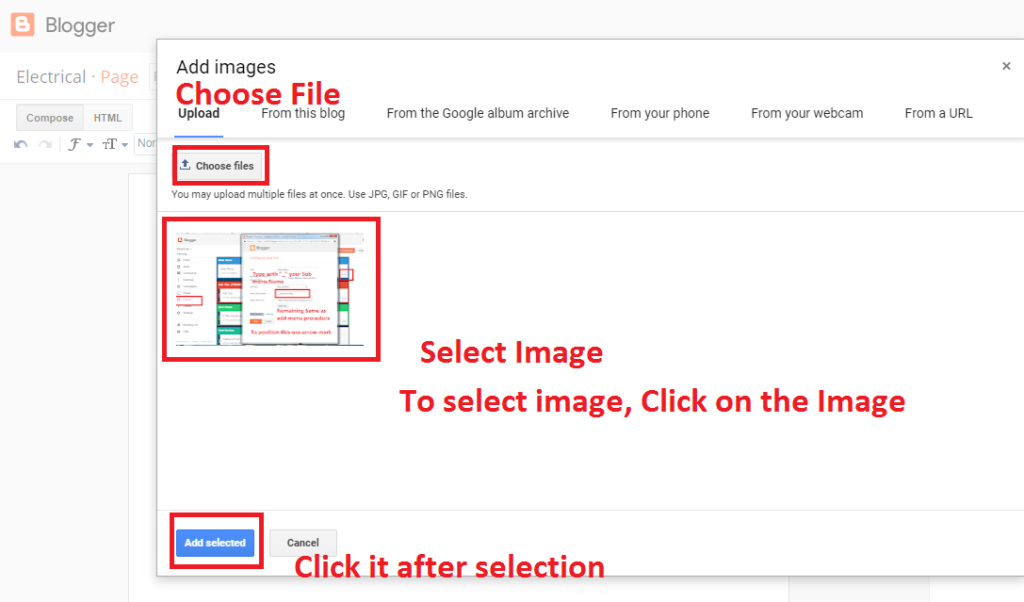
Step8: Click choose file
Step9: Upload your desired image which URL to be created
Step10: Select by click mouse on the photo
Step11: Click add images in the downside
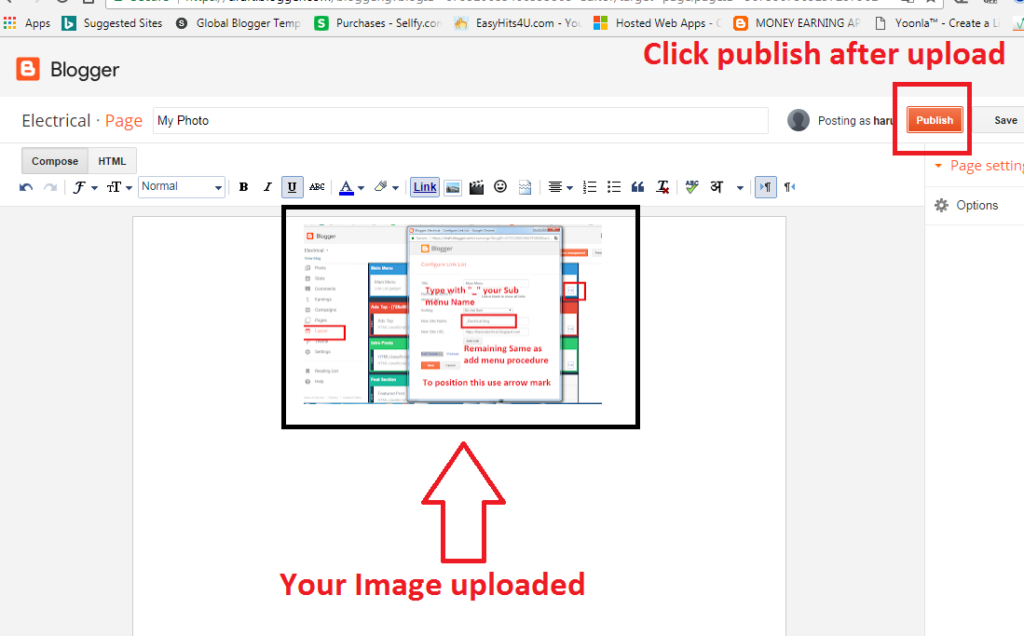
Step12: Click Publish
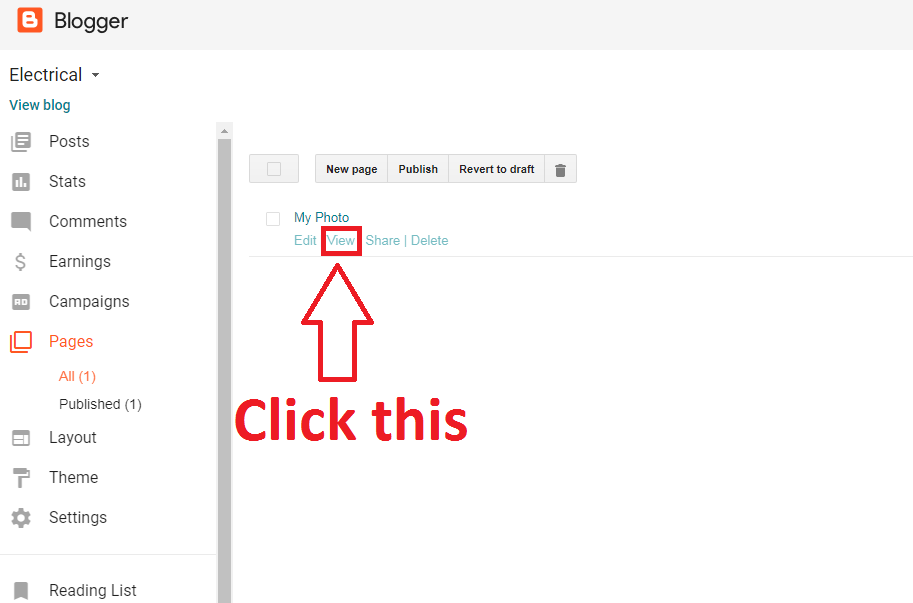
Step13: Come to page section => click view page
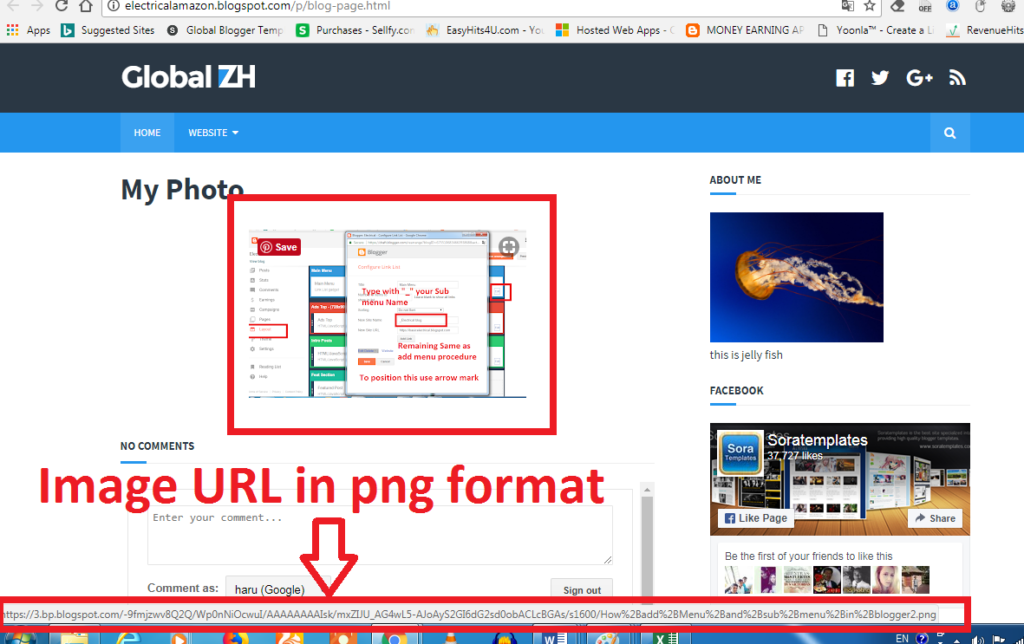
Step14: there you will see your uploaded image, by moving or placing the cursor on the image, you can see your image format…. See the picture,..
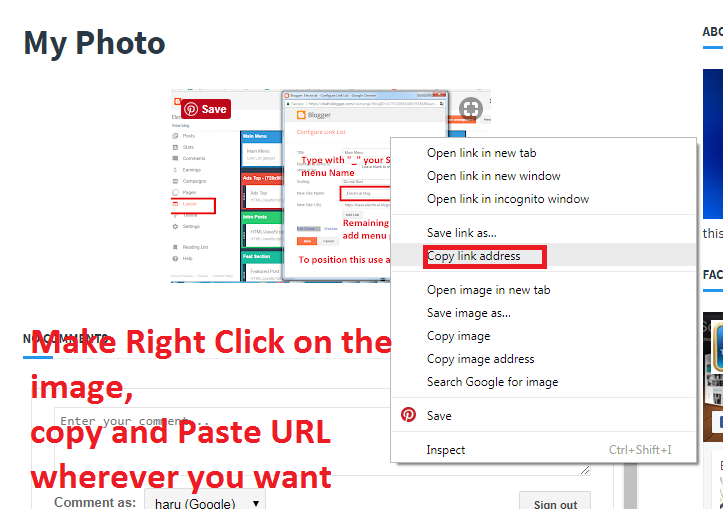
Step15: Click right click on the image. Copy and paste the Image URL wherever you want it…
Note: by repeating the same procedure, you can create infinite number of images and its URL.
Comment me if you have doubt,
Also see This:
How to create Awesome Blog in Blogger.com
How to hide author Name in blogger post with simple steps
How to Delete your blogger blog permanently
How to Change Author photo in blogger for premium template
3 Simple Way to change blog author name on blogger
How to Create Image URL in png or Jpg or gif format
How to Change Admin Name in Blogger
How add Menu and Submenu in blogger
How to change theme of your blog in blogger
How to Edit about me on blogger
How to change profile picture on blogger with Pictured Explanation

